Shiny and Chic Bracelets
You will need to flatten and prepare the gum wrappers. Ensuring they are clean and smooth, you create a better foundation for your bracelet, making the upcoming steps more manageable. Cutting these wrappers into even strips is necessary as it affects the final appearance and strength of the bracelet. Each strip is then meticulously folded lengthwise, transforming them into durable bands ready for weaving.
The once simple gum wrapper begins to take the form of a stylish accessory. Weaving strips may seem difficult, but it quickly becomes a rhythmic and calming activity. Depending on your taste, you can opt for a simple braid for a minimalist look or a more intricate pattern if you are feeling adventurous. It’s fascinating how such simple materials can translate into a sophisticated piece with a bit of creativity and patience.
To finish the bracelet, securing the ends effectively is vital. This can be achieved using clear tape or strong glue to ensure that your creation is wearable and durable. Adding a clasp or a decorative bead can elevate the look, transforming your bracelet from a simple craft into a statement piece that tells a story of sustainability and creativity.
Creative Collages
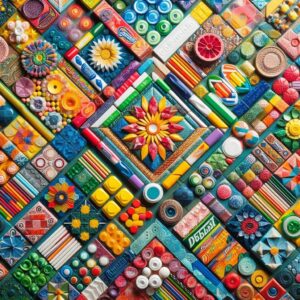
The process of making a collage from gum wrappers starts with collecting and organizing these colorful pieces. By grouping the wrappers according to color, texture, or specific designs, you set a palette for your artwork. This preparatory step is envisioning the final piece, allowing an organic flow of creativity from mere materials to a cohesive piece of art.
The next step involves laying out a design. This could be done on a sturdy base like poster board or canvas, providing a solid foundation for your artwork. You might sketch your ideas to establish a clear direction for your piece. The layout serves as a blueprint that guides your artistic decisions.
Using glue or mod podge, you start affixing the wrappers carefully, paying attention to the overlaps and edges to ensure complete coverage. This part of the process requires a delicate balance of precision and artistic flair, as the placement of each wrapper affects the overall aesthetics of the collage.
To ensure the longevity and durability of the artwork, it is advisable to seal the completed collage with a clear varnish. This enhances the colors and gives the piece a professional finish.
Decorative Star Ornaments
The making of decorative star ornaments begins with gathering and preparing gum wrappers. By choosing wrappers of various colors and patterns, you can design stars that are vibrant and eye-catching or more understated, depending on your decor preferences. Each wrapper is cut into strips, the width of which will determine the final size of the star. These strips are then folded to increase their durability and to facilitate easier assembly later on.
 Constructing the star involves creating loops from the strips by securing the ends of each strip together with glue. This core step requires precision as the strength and symmetry of the loops determine the stability and appearance of the finished ornament. You assemble these loops, arranging them in a radial pattern to form the iconic star shape. The points where the loops meet are secured with glue, ensuring the structure holds firm and maintains its form.
The decorative star can be further embellished, or it might simply be left as it is to appreciate the patterns of the gum wrappers that now serve a new purpose. Adding a string or a ribbon for hanging is the final step, making it easy to display the star in a window, on a holiday tree, or any other suitable spot.
Upcycled Gum Wrapper Picture Frames
To create a picture frame from gum wrappers, one begins by collecting a sufficient quantity of wrappers, which will be the primary material for the frame’s façade. This process is a mindful exercise in recycling, requiring one to see beyond the conventional use of a product and envision its potential as a raw material for art.
The foundation for the frame can be fashioned from sturdy cardboard cut to the desired dimensions or by repurposing an old frame that needs a new life. This base provides the necessary support for the wrappers and dictates the size and shape of the final product.
The next phase involves carefully covering the surface of the base with gum wrappers. Each wrapper should be flattened and arranged in a pattern or at random, depending on the desired aesthetic effect. It’s necessary to ensure that the wrappers slightly overlap, covering the base entirely to prevent any gaps. This step might require a strategic approach to color coordination and pattern placement to create visual harmony.
Adhering the wrappers to the frame can be achieved with glue or double-sided tape, securing them in place. It’s important that the wrappers adhere well to the base to maintain the integrity and appearance of the frame over time.
To complete the picture frame, a sealant such as clear varnish or acrylic sealer is applied. This serves as a protective layer that guards against damage and wear. This finishing touch ensures durability, allowing the frame to hold up just as well as any store-bought alternative.
Eco-Friendly Gift Bags
To start creating eco-friendly gift bags from gum wrappers, the first step involves collecting a substantial amount of gum wrappers. This initial phase is important as it determines the design and size of the gift bag. By choosing wrappers of various colors and designs, one can customize the appearance of the gift bags to suit specific occasions or personal preferences.
The construction of the bag requires arranging the wrappers into a cohesive sheet. The wrappers are aligned and overlapped to form a sturdy and attractive base material. This sheet serves as the main fabric of the gift bag, and its dimensions must be carefully planned to ensure it can adequately hold a gift.
Once the main sheet is prepared, it is shaped into a bag. This involves folding and securing the edges to form the sides and bottom of the bag, which requires precision and attention to detail to ensure the bag will be strong enough to carry typical gift items. The use of glue or double-sided tape is essential for reinforcing the corners and edges where the gum wrappers meet, providing the necessary durability.
Adding handles to the gift bag is the final step, which can be done by attaching ribbons or strings through punched holes at the top of the bag. This enhances its aesthetic appeal. The choice of ribbon or string can complement the color scheme or theme of the wrappers, tying the whole design together seamlessly.


